
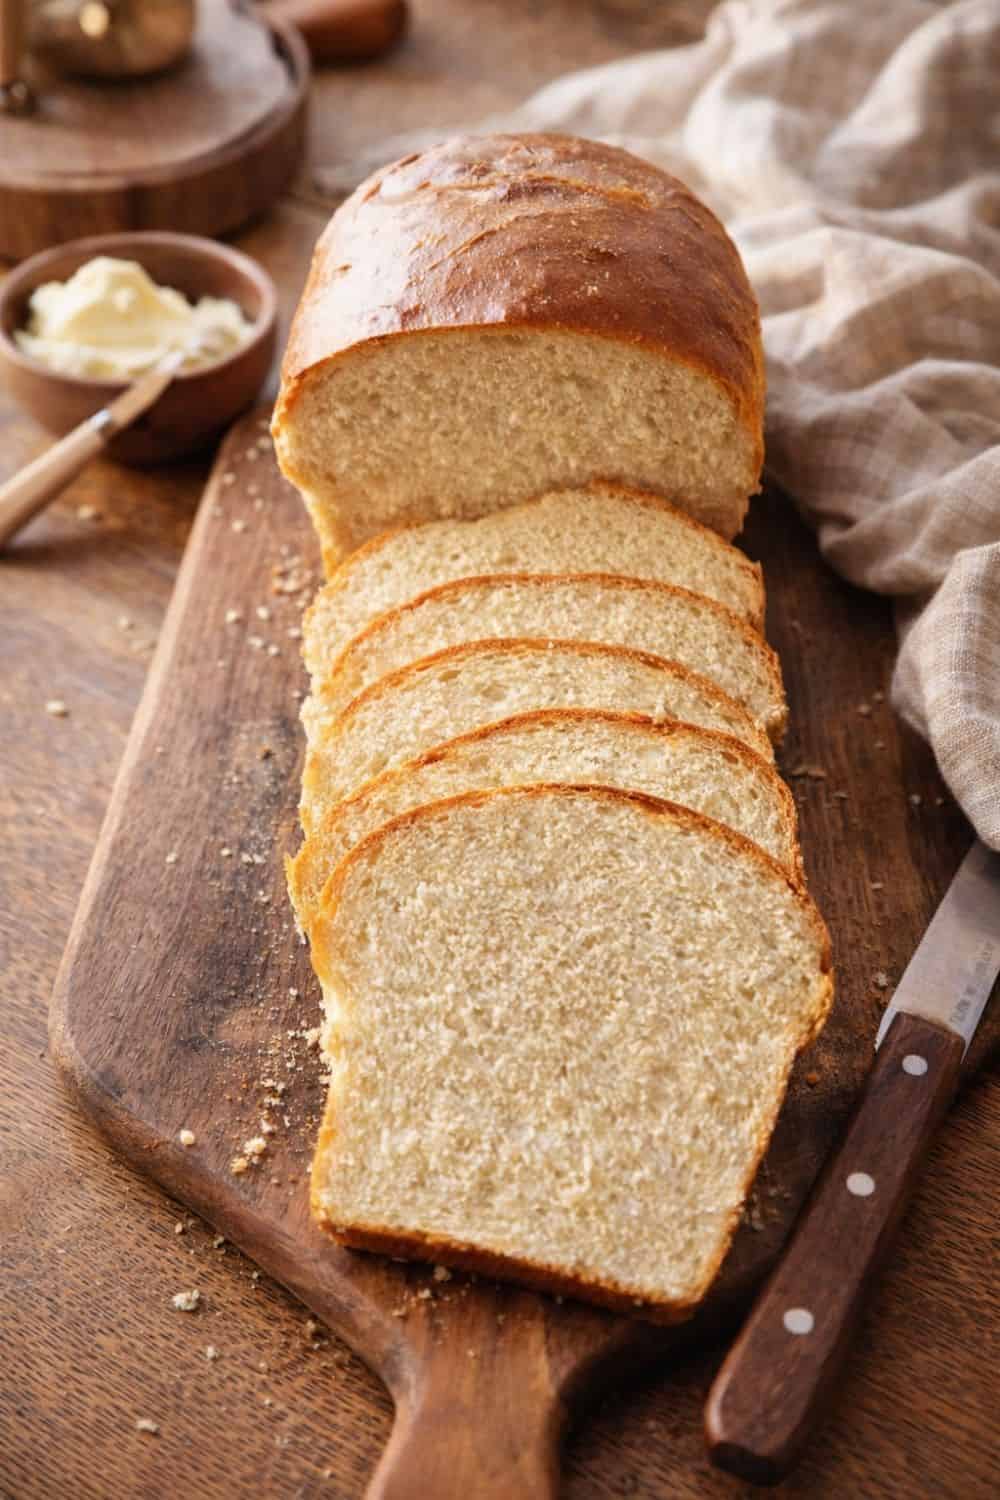
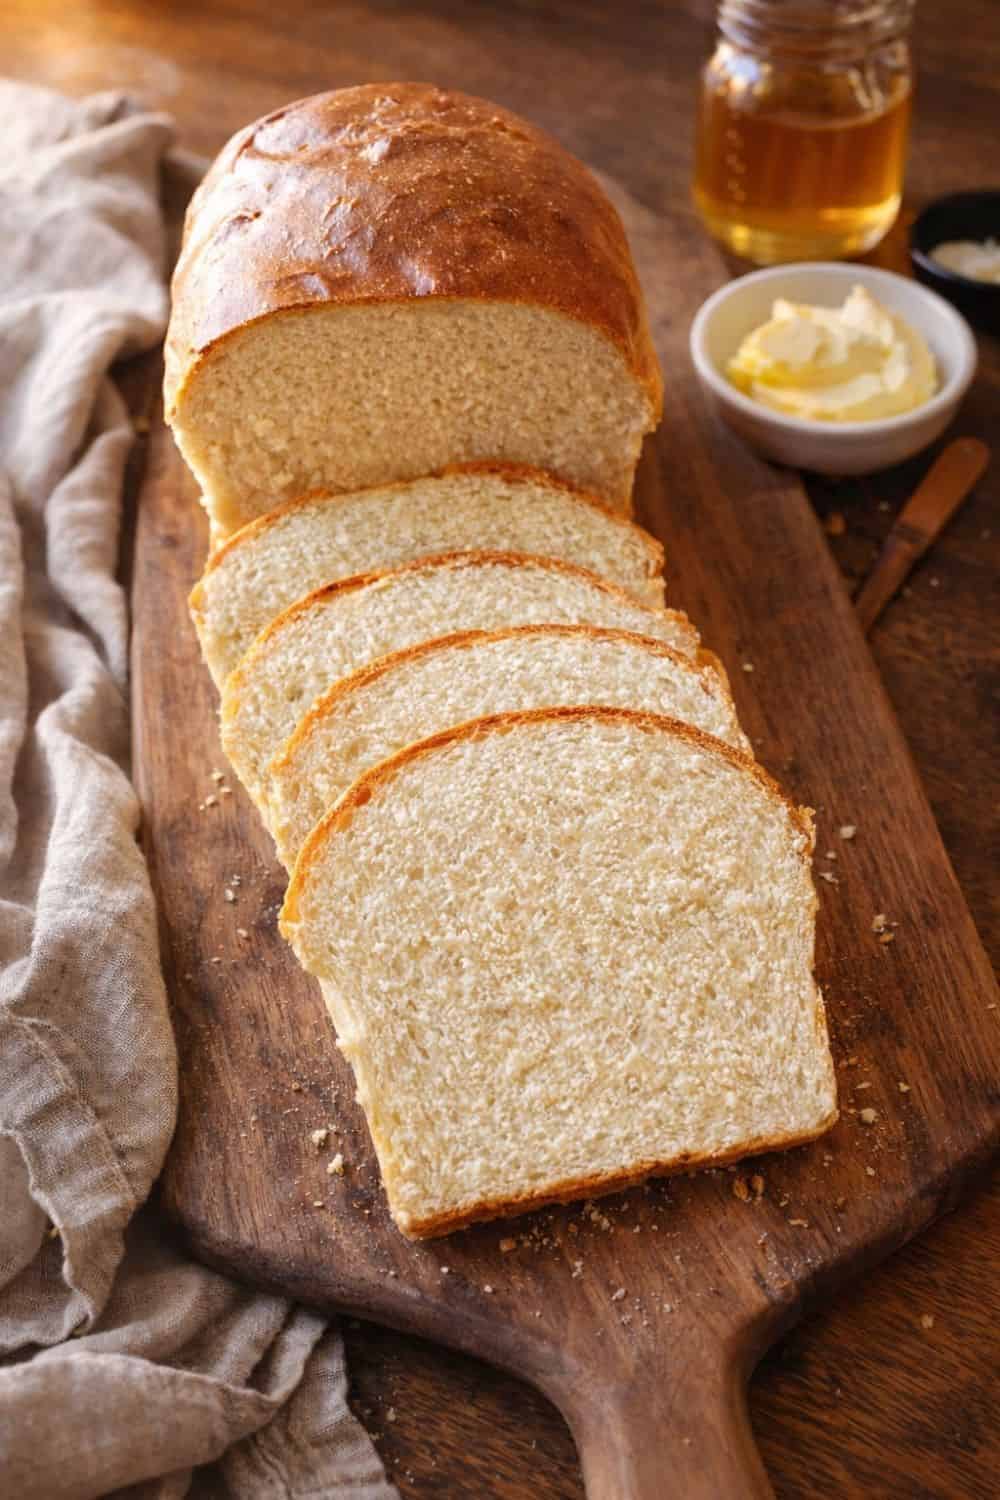
Easy Homemade White Sandwich Bread
This easy homemade white sandwich bread is the soft and fluffy sandwich bread dreams are made of. You know, the kind of bread that makes you want to stand at the counter and eat it warm straight from the oven. It’s a simple recipe that makes two loaves of tender and delicious bread perfect for your favorite sandwiches or toast. And this is a great recipe whether you’re a beginner wanting to bake your own sandwich bread, or an experienced baker looking for a reliable recipe. {And if you love soft and fluffy bread, check out my recipe for the Best Soft Dinner Rolls.}
I get approached by a lot of folks looking for easy homemade bread recipes and for good reason. Breadmaking is one of those skills that you can get a lot of use from throughout a lifetime. There is a bit of a learning curve if you’re just starting, but like most learned skills, it becomes easier with practice.
But beyond skill and experience, there is the matter of recipes. It’s good to have a few tried and true bread recipes in your back pocket. If you’ve tried making homemade sandwich bread in the past, you know that sometimes the results can be a little bit disappointing. The loaf may be lacking flavor. Or maybe the texture doesn’t seem quite right, or the crust is a little bit too hard.
But this basic white sandwich bread recipe is one I have found to be delicious, and reliable, and it makes what I think is the best sandwich bread. It ticks all of the boxes for me. Soft texture inside, with good flavor and texture, and a soft, buttery crust outside. And I love that there are no specialty ingredients involved. I always have what I need on hand and I don’t have to buy any pricey additives to get the bread I want.
What are the ingredients for this Homemade Sandwich Bread?
This homemade white sandwich bread requires only a handful of simple ingredients:
Active Dry Yeast – I prefer active dry yeast instead of instant or rapid-rise yeast for this recipe. Yes, it does take longer to rise, but I find the longer rising time results in a better flavor and texture for this bread recipe.
Milk – I prefer to use whole milk to make this bread. You can substitute a lower-fat milk or even a plant-based milk (I haven’t tried that out.) You can also use just water. But know that swapping out dairy milk may alter the texture of the bread.
Sugar – I use regular granulated sugar. You can omit the sugar, but it will change the flavor of the bread and may affect how well the crust browns.
Salt – Fine sea salt or table salt works best.
Butter – I use salted butter. You can use unsalted butter, but you will need to add an extra small pinch of salt to the recipe.
Flour – Bread flour will give you the best results. You can use all-purpose flour, but the bread will be slightly less chewy and a little more crumbly. If you make bread regularly, it’s worthwhile to keep a bag or two of bread flour in your pantry.
Tips for making the best homemade sandwich bread:
- Use fresh yeast and don’t skip the proofing part. You’ll need to add the yeast to lukewarm water (not hot water or you will likely kill your yeast) and allow it to sit for a few minutes. If the yeast is alive and good to use in your dough, it will get foamy. If it doesn’t get foamy, you’ll need to get some new, fresh yeast.
- Add the flour gradually. As you’ll see in the recipe, I give you only an approximation of how many cups of flour you will need. This is because it varies on any given day. Factors like the humidity in your house and the brand of flour you are using will affect how much flour you will need to add to your dough. You’ll want to add enough flour that the dough isn’t a wet, sticky mess, but not so much flour that the dough is overly stiff and dry. Stop adding flour and proceed to knead the dough when it is slightly sticky and has come together into a rough ball.
- Use a stand mixer if you have one. Yes, you can make this bread with a wooden spoon and your hands, but it takes quite a bit of effort to knead. So unless you don’t mind a good arm workout, go ahead and break out your mixer for this project. I like to add the ingredients to the bowl of a stand mixer, and then start with the paddle attachment. As I add more flour and the dough becomes stiff, I switch to the dough hook attachment to continue kneading. I then knead the dough on low speed for about 8-10 minutes until the dough pulls away from the sides of the bowl and becomes smooth and springy.
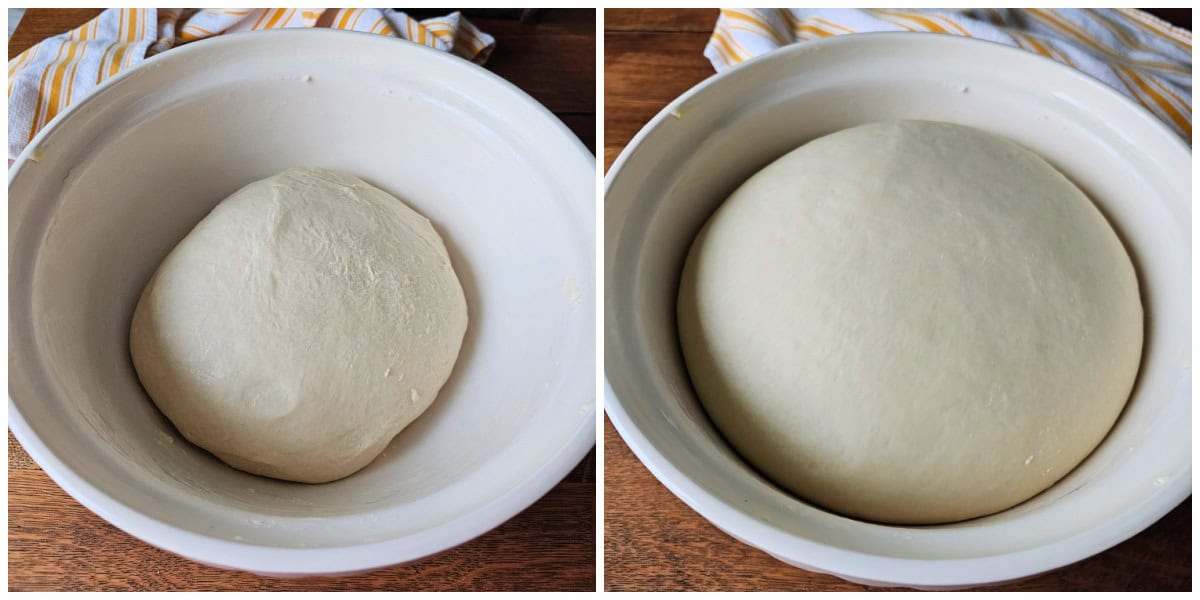
- Be patient. For the first rise, let the dough rise and fully double in size before shaping your loaves. Do this by placing the dough into a large bowl generously greased with butter. Drape a clean kitchen towel over the bowl, or cover it with plastic wrap. Place it into a warm place to rise until it doubles in size. For the second rise, punch down the dough and shape the loaves. Place the shaped loaves into the pans and allow them to rise a second time. You don’t want to let them rise so much that they are blown up and overflowing the pan, but you do want them to double in size to get the right texture. The rise time will vary from one to two hours. Putting the dough into a warm place to rise will speed up the process.
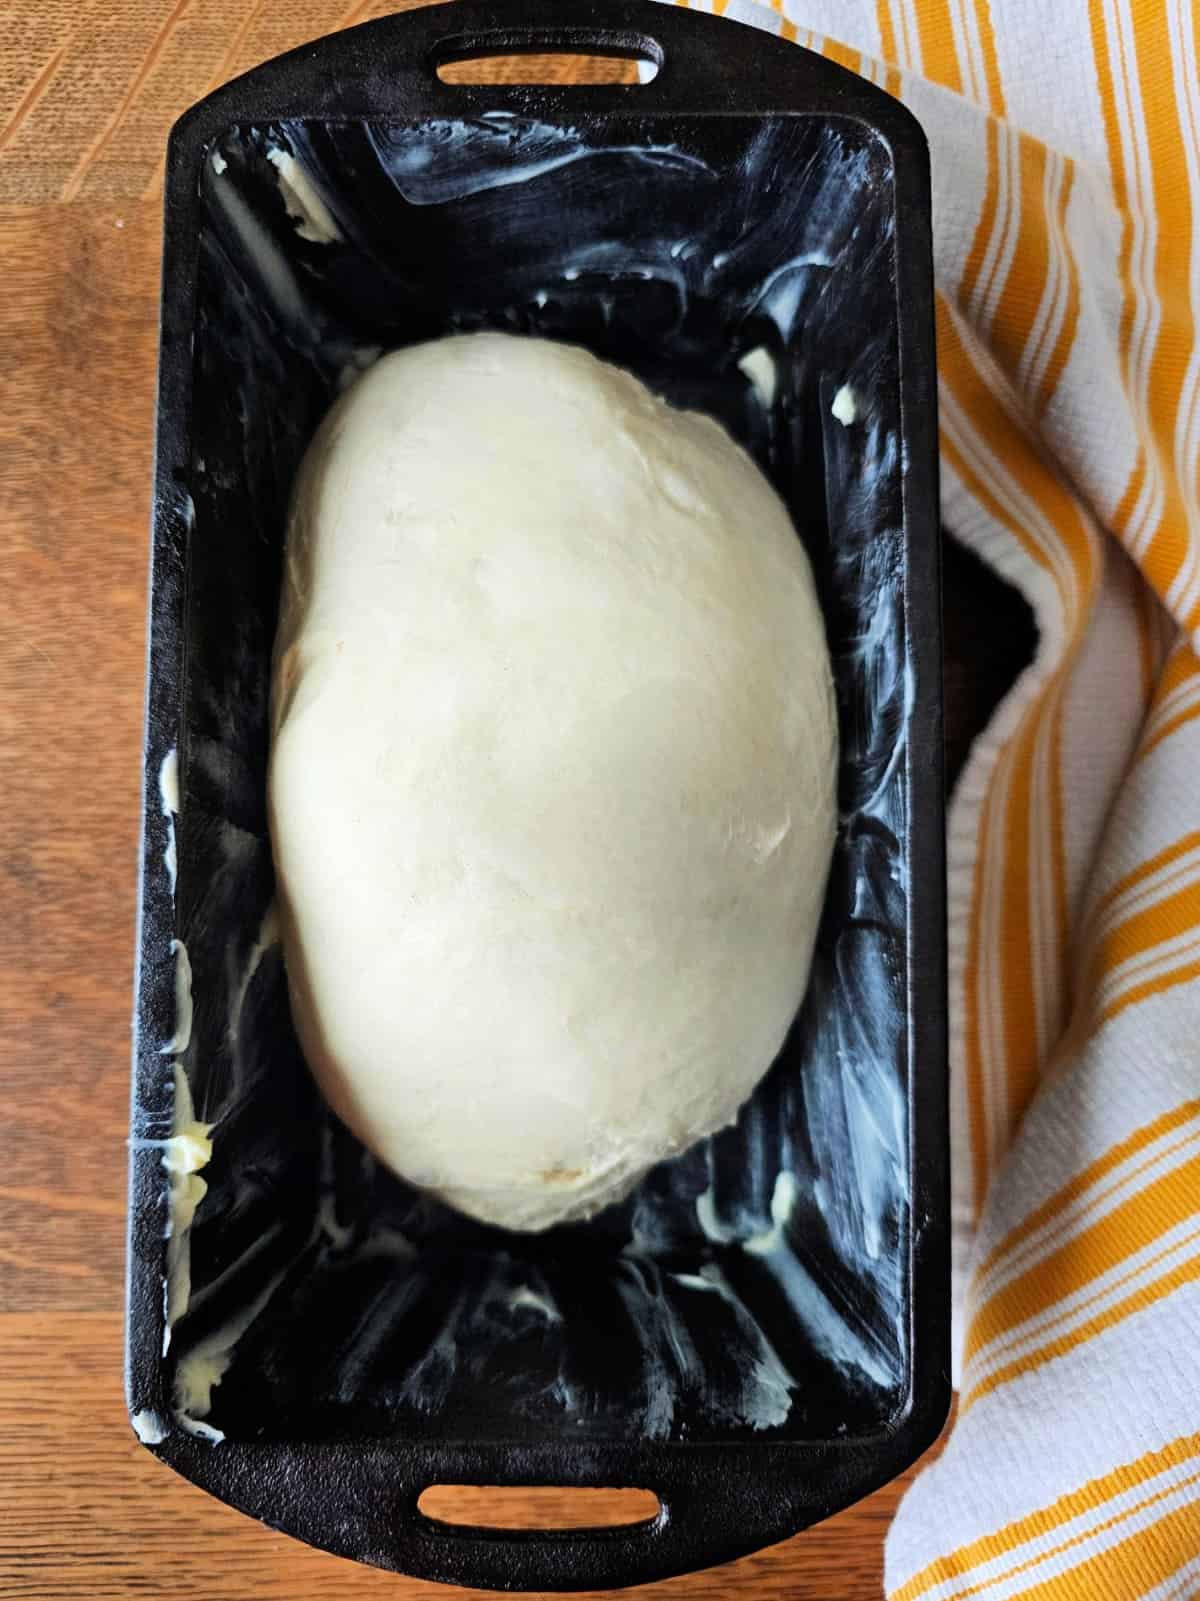
- Shape the dough. The right loaf shape will make all of the difference. To do this, you want to shape the dough on a lightly floured surface. Don’t use too much flour because you don’t want to add more flour than necessary to the dough. Also, you want to shape the dough in a way that creates a taut outer “skin” that helps the bread retain its shape. An easy way to do this is to roll out the dough into a rectangle roughly the length of the pan and then tightly roll it up and place it into the pan seam side down. You can also shape the dough by hand and then roll it around a bit on the counter until it forms a smooth, tight surface before placing it in the pan for its second rise.
- Use the right size bread pan. A pan that is approximately 5″ x 9″ will work great. My favorite bread pan is this cast iron one by Lodge.
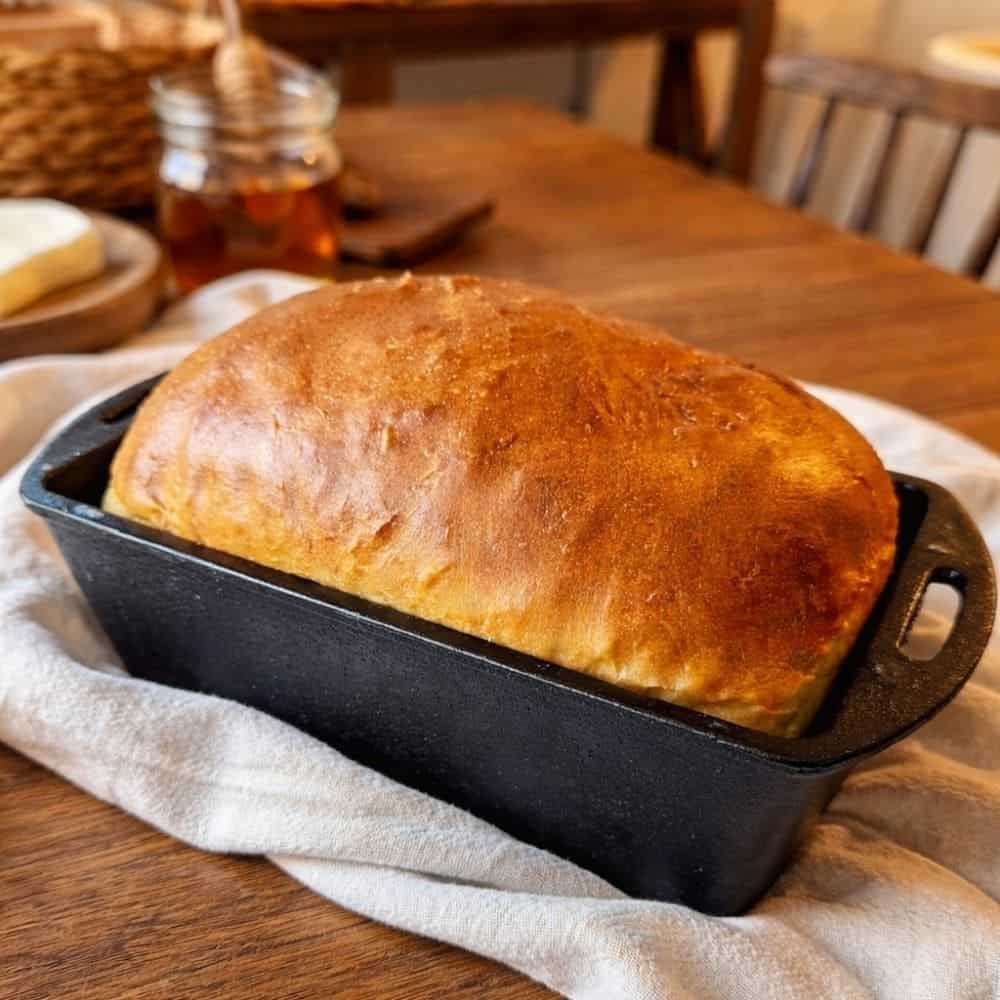
- Brush with melted butter. As soon as you pull those golden brown loaves out of the oven, go ahead and brush the top of the loaves with a couple of tablespoons of melted butter. This will help to ensure a soft crust.
- Allow the bread to cool. I know it’s tempting to tear into that bread while it’s still warm. I’ve done it plenty of times. There is nothing better than a warm hunk of bread slathered in butter. But if you want neat slices of bread for sandwiches, allow the bread to fully cool before slicing. To help this along, allow the bread to cool enough to handle, then turn the loaves out onto a wire rack to cool.
Answers to Questions about Making the Perfect Sandwich Bread:
Can I use a bread machine?
The answer to this is that I haven’t tried this recipe in a bread machine, so I’m not sure (if you try it, be sure and let me know.) But most bread machines have a dough cycle that kneads the dough but doesn’t bake it. You can mix your bread dough in the machine on this cycle and then shape the loaves and place them into the pans for the second rise. Continue with the recipe instructions from there.
Can I add whole wheat flour?
If you want whole wheat sandwich bread, you can replace some of the white flour with whole wheat flour. Try replacing 1-2 cups the first time. Too much whole wheat flour will make the loaf heavy. I encourage you to experiment to find the mix of flours that you prefer.
How do I store my bread? Can I freeze bread?
When I make a crusty artisan loaf of bread, I simply wrap it in a cloth tea towel. But you don’t want to do that with this bread because it will lose the soft sandwich bread quality. Instead, I’ve found the best way to keep bread soft is to store it in a plastic bread bag. The old-fashioned kind with the twist tie. Aluminum foil also works well. But if you want to avoid using plastic, then a resealable silicone bag is a good choice. King Arthur Flour has a helpful article about how to store yeast bread.
You can freeze this bread before or after baking. I will freeze the raw dough by allowing it to rise, then punching it down and shaping the loaves before freezing. When ready to bake, place the frozen loaves into prepared pans and allow them to thaw and rise on the counter for 2-3 hours.
Or you can bake the loaves, then wrap them tightly in plastic wrap and freeze. Allow them to thaw on the counter when you need them.
So that’s all there is to making homemade sandwich bread. I hope this helps you to make the perfect loaf. And don’t forget to follow me on Facebook, Pinterest, and Instagram so you don’t miss a post.
*As an Amazon Associate I earn from qualifying purchases. This post may contain Amazon or other affiliate links, which means I will earn a commission at no additional cost to you if you click through and make a purchase.
Print
Easy Homemade White Sandwich Bread
- Total Time: 3-5 hours
- Yield: 2 loaves
Description
This recipe for white sandwich bread makes two loaves of soft and delicious bread. Use it for your favorite sandwiches or toast.
Ingredients
- 2 cups water
- 1 cup milk
- 4 1/2 teaspoons active dry yeast (2 packets)
- 3 tablespoons sugar
- 6–7 cups bread flour, divided
- 1 tablespoon salt
- 2 tablespoons butter, softened
- Butter for greasing bread pans and brushing on bread loaves
Instructions
- Warm the milk and water together over low heat in a saucepan on the stove, or in 30-second increments in the microwave. You want the mixture to be just warm, not hot. If the liquid is too hot, it will kill the yeast. Around 100-110 degrees Fahrenheit is perfect.
- Stir the yeast and sugar into the warm water and milk mixture. Set aside for a few minutes until it is foamy and fragrant. If it doesn’t foam within 10 minutes or so, the yeast is not viable and you will need to start again with fresh yeast.
- To a large mixing bowl, add 3 cups of flour and the salt. Whisk to combine. (If you are using a stand mixer, add the ingredients to the bowl of the stand mixer. If you are making the bread by hand, use any large mixing bowl.) Add the yeast mixture and the softened butter. Use the paddle attachment or a sturdy spoon to combine the ingredients.
- Add the remaining flour gradually to the dough mixture. If you’re using a stand mixer, now is a good time to switch to the dough hook. If doing it by hand, continue to use your wooden spoon or switch to using your hands to mix.
- You may not need the entire 7 cups of flour. Continue to add flour until the dough is slightly sticky, and starts to pull away from the sides of the bowl. If hand mixing, the dough should become easy to handle and come together into a rough ball. Do not make the dough too stiff or the bread will be dense.
- After the dough comes together, knead it until it is smooth and springs back when poked with your finger. This will take about 8-10 minutes with the stand mixer, or up to 25 minutes if kneading by hand.
- Place the kneaded dough into a bowl greased with butter. Cover with a clean tea towel or plastic wrap and put the bowl into a warm place. Allow the dough to rise for 1-2 hours or until doubled in size.
- When the dough has doubled in size, gently punch it down to remove the air. Divide into two equal pieces and then shape to fit the pan. Place the shaped loaves into greased bread pans and set them in a warm place to rise again. *See notes below about shaping the dough.
- When the dough has risen to almost double in size again, preheat your oven to 375°F. When the oven comes to temperature, place the pans into the oven. Bake for 30-35 minutes, or until the loaf is golden brown and sounds hollow when tapped. For the most accurate result, the internal temperature should be about 190°F.
- Remove the pans from the oven and place them on a wire rack to cool. Immediately brush the tops of the bread with butter (about a tablespoon per loaf). When the bread has cooled enough to handle safely, remove the loaves from the pans and place them back on the wire rack to finish cooling completely.
- When the loaves are cool, you can slice them or wrap them up for later. Store at room temperature or freeze for later.
Notes
When shaping the dough, you’ll want to create a surface tension or a taut “skin” on the surface of the dough. This helps the dough to retain its shape and create a nice interior texture as it rises and bakes. This can be done in multiple ways. One of the easiest is to roll out the dough into a rectangular shape and then roll it up into a loaf shape and place it seam-side down in the pan for its second rise. You can also take the piece of dough and turn it inside out a few times, and then roll it around on the countertop as you shape it into a loaf shape.
- Prep Time: 30 minutes
- Cook Time: 35 minutes


I’m always intimidated to make bread, so I was so surprised how well this turned out for me. The instructions were clear and easy to follow. And my family scarfed down both loaves so I didn’t even have a loaf left to freeze! Thank you!
Your bread looks perfect! What a delicious loaf…so soft! You’ve inspired me to make some this week ^_^
Thank you! You can’t go wrong with a loaf of homemade bread!