
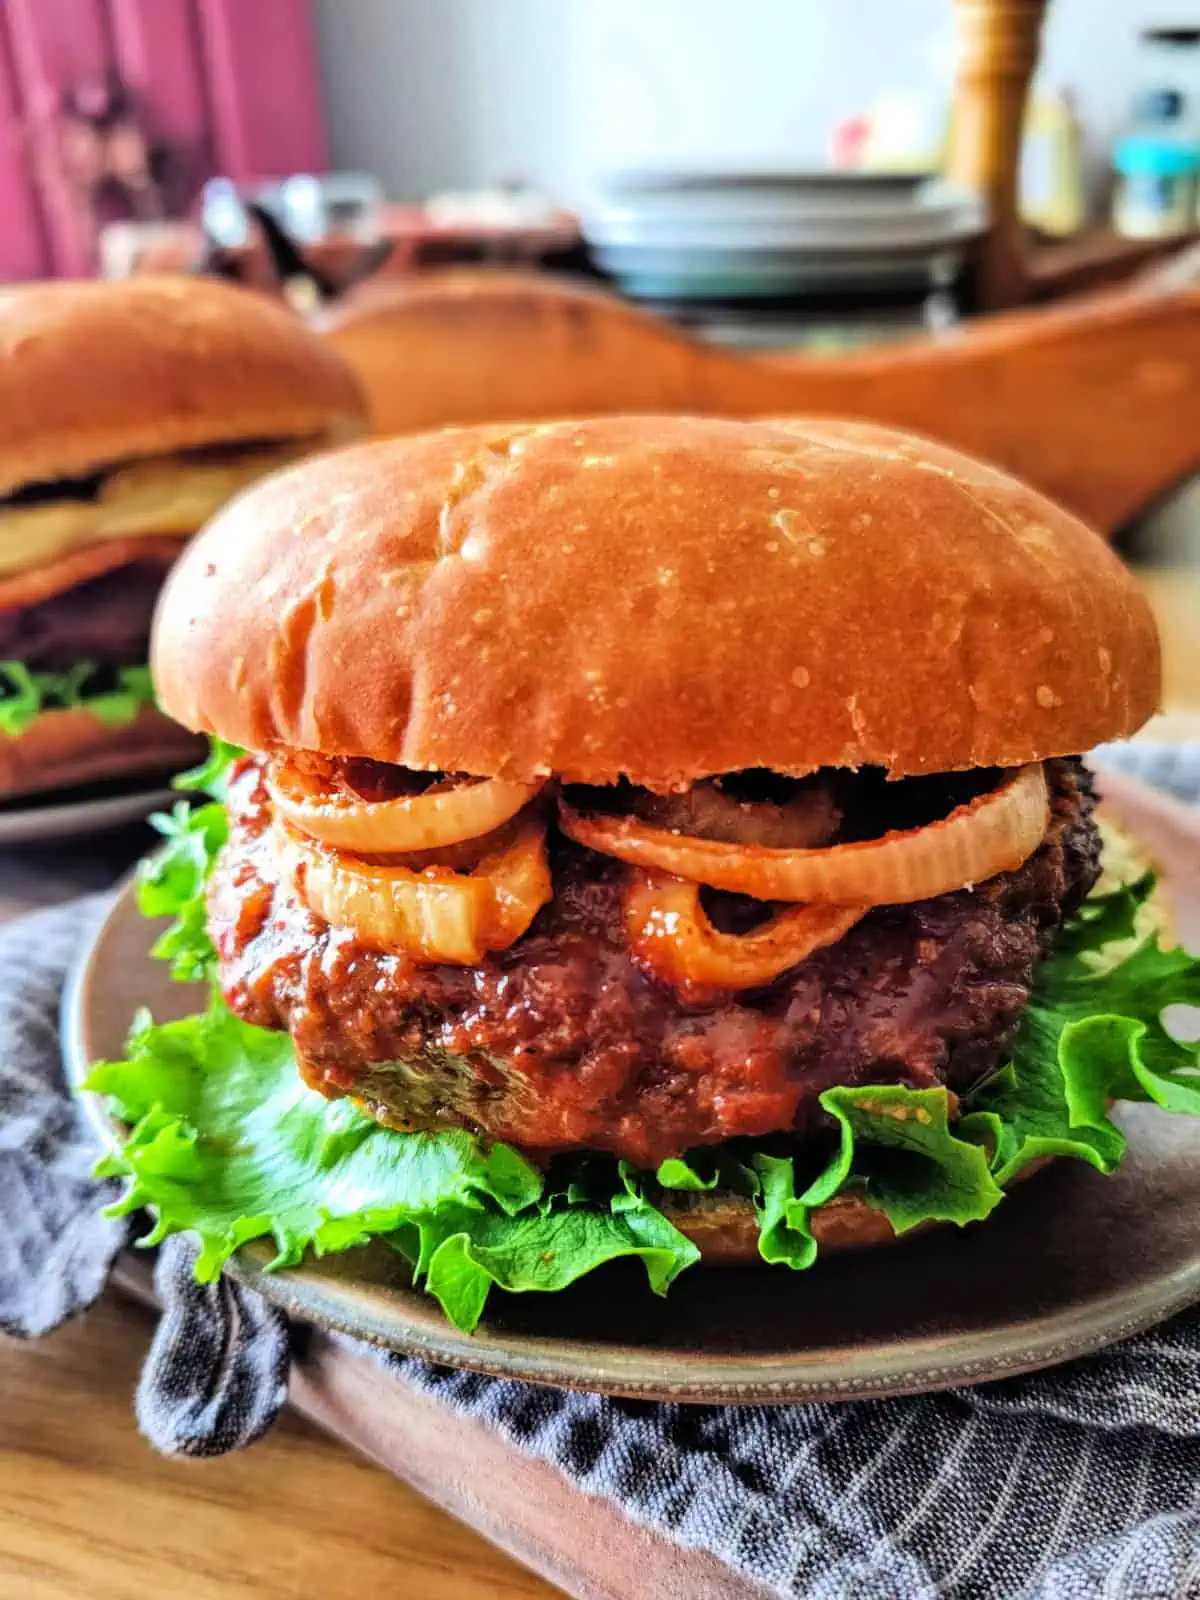
Easy and Quick Hamburger Buns
Have you ever had dinner all planned out, only to realize—right as you’re about to start cooking—that you’re missing something important? Something like… the buns for your burgers or sandwiches? Yeah, me too. That was me one evening as I prepped BBQ chicken for sandwiches, only to discover I had no buns or rolls in the house. Thankfully, I had this trusty recipe for easy and quick hamburger buns tucked away in my recipe box. Crisis averted.
(And if you need a good bread recipe to go with soup or stew, you might also love my Cheddar Rosemary Beer Bread or my Easy Homemade Sandwich Bread!)
*This recipe was originally published in June 2018. It was updated for clarity in April 2025, but the recipe remains the same.*
These quick hamburger buns are so simple and satisfying, they seem almost too good to be true. According to my husband, this recipe makes the best hamburger bun. And while it does require a few minutes of kneading, the entire recipe comes together—from mixing to baking—in under an hour.
Seriously, don’t wait for a dinner emergency to try these. The next time you’re grilling burgers or building a really good sandwich, go ahead and make a batch. You won’t be sorry!
And if you’re not an experienced baker, don’t be intimidated—I’ll walk you through the process step-by-step.

Ingredient Notes for these quick hamburger buns:
Let’s talk about a few of the ingredients and how to get the best results. The full list of ingredients and step-by-step instructions are in the recipe card below.
Active Dry Yeast
This recipe uses active dry yeast, which means you’ll need to mix it with warm water and a bit of sugar, then let it sit for a few minutes until it’s foamy. This step is called “proofing” the yeast and confirms it’s alive and ready to work.
If you only have instant or rapid-rise yeast on hand, no problem! You can substitute 1½ tablespoons of instant yeast for the 2 tablespoons of active dry yeast. Instant yeast doesn’t need to be proofed, so just mix it right into the flour.
Canola Oil
Canola oil gives these buns a soft, tender texture, but feel free to use any neutral-tasting oil you prefer—avocado or sunflower oil work beautifully.
If you’d rather use butter, substitute ¼ cup melted butter in place of the oil. (Butter contains water as well as fat, so the measurement is slightly different.)
Want to use coconut oil? Go for it—but just know it may add a hint of coconut flavor to the finished buns.
Flour
This recipe calls for all-purpose flour, which keeps the buns soft and light. If you want to incorporate some whole grains, you can substitute up to 1 cup of whole wheat flour for part of the all-purpose. Just note that whole wheat flour tends to absorb more liquid, so you may need to add a bit more water or oil to keep the dough soft and pliable.
Salt
Stick with fine salt, like sea salt or table salt here. Coarse salt won’t dissolve as evenly in the dough and may leave pockets of saltiness behind.
Sugar
You might be tempted to skip the sugar, but don’t. The sugar not only helps the dough rise but also enhances the flavor of the finished buns. I prefer to use natural cane sugar, but any granulated sugar will do the job.
Tips for Making Your Buns Bakery-Worthy
Make your homemade buns soft, flavorful, and picture-perfect with these simple tricks!
Cool Completely Before Slicing
Once the buns come out of the oven, transfer them to a wire rack and let them cool fully before slicing. This helps set the crumb and gives you that light, fluffy interior you want in a homemade bun.
Customize Your Dough
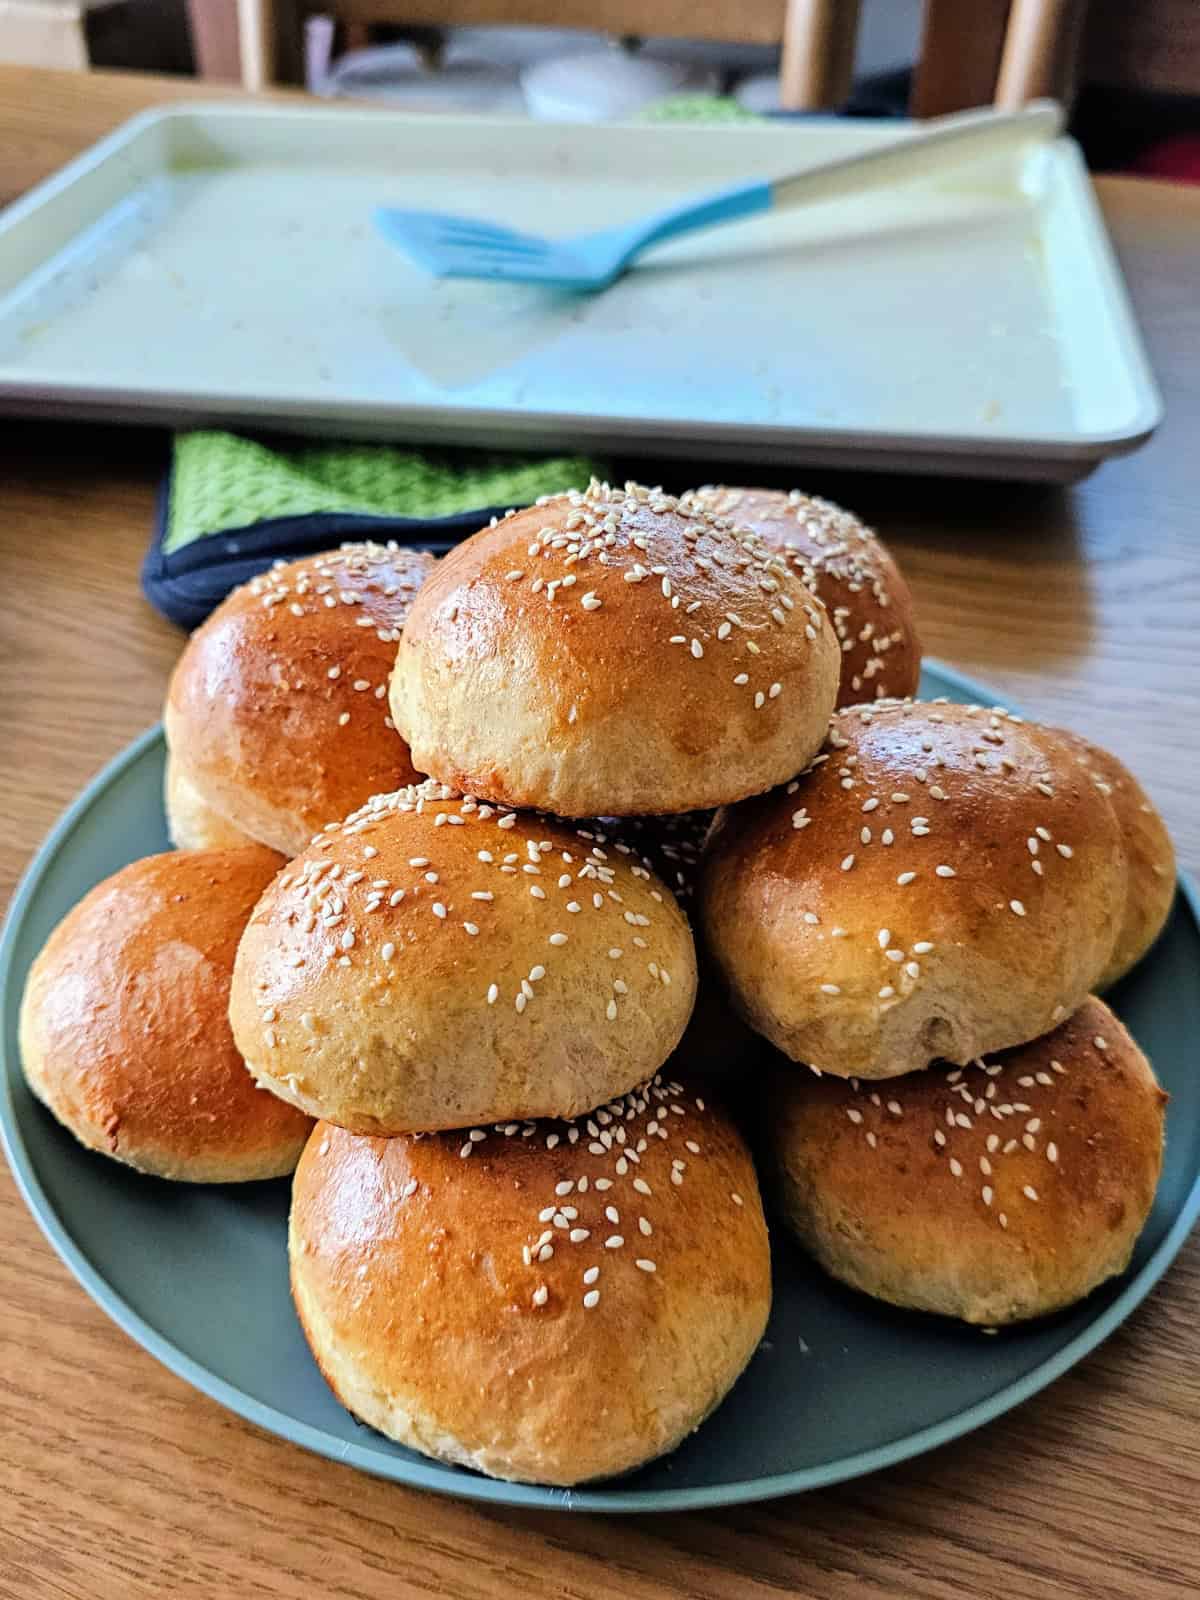
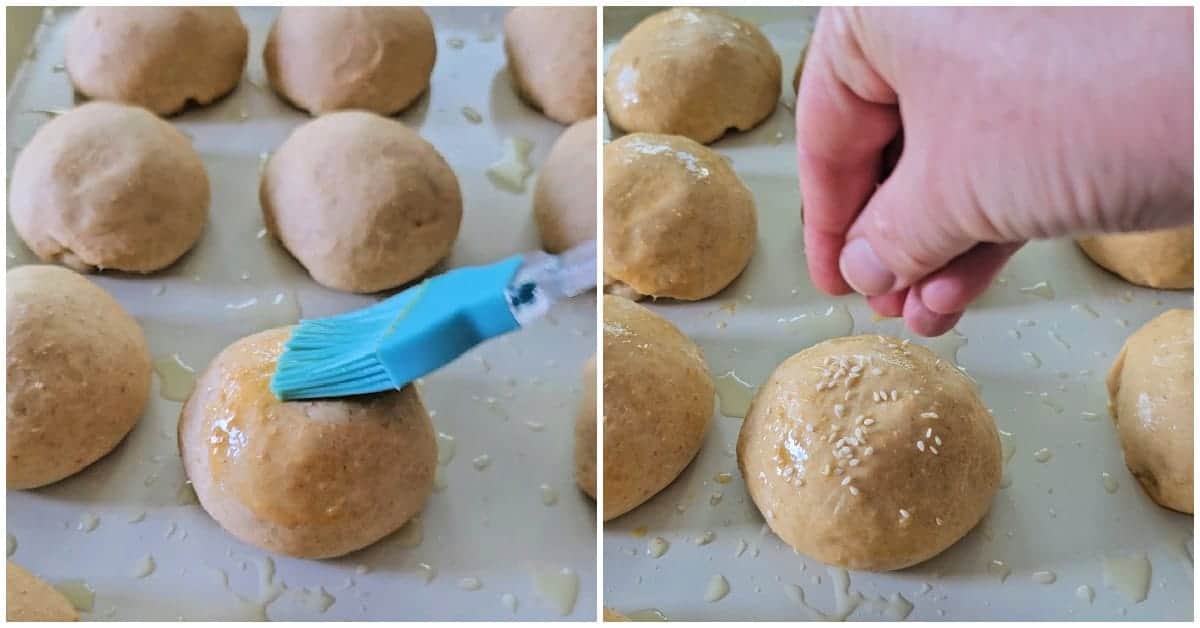
Mix herbs or seasonings right into the dough to create a custom flavor profile. You can also add a classic touch by brushing the tops with egg wash and sprinkling sesame or poppy seeds before baking.
Choose Your Size
• 8 buns – Perfect for big, juicy burgers
• 12 buns – Great for sliders or smaller sandwiches
• 16 buns – Soft, fluffy dinner rolls
How to Shape Like a Pro
To create beautifully round buns with a smooth top, use surface tension to your advantage. Lightly cup your hand over each dough ball and roll it in a circular motion on the counter. This tightens the surface and helps the buns rise high and bake up evenly, just like the bakery!

Ready to Bake?
Whether you’re prepping for a backyard cookout, a cozy family dinner, or just craving a really good sandwich, these homemade quick hamburger buns are the perfect way to elevate your meal. Once you make them from scratch, it’s hard to go back to store-bought!
If you try this recipe for Easy and Quick Hamburger Buns, I’d love to hear how it turned out for you! Share your thoughts in the comments below, and don’t forget to rate the recipe—it helps others discover it too!
Be sure to follow me on Facebook, Pinterest, and Instagram for more homemade recipes
*As an Amazon Associate I earn from qualifying purchases. This post may contain Amazon or other affiliate links, which means I will earn a commission at no additional cost to you if you click through and make a purchase.*
Print
Quick and Easy Hamburger Buns
- Total Time: 47 minutes
- Yield: 12 buns
Description
Homemade hamburger buns in under an hour? Yes, please! These quick hamburger buns are soft, slightly sweet, and perfect for your favorite burgers or sandwiches. The dough comes together quickly and rises fast, making them ideal for busy nights or impromptu cookouts.
Ingredients
- 1 cup warm water (about 110°F)
-
2 tablespoons active dry yeast
-
3 tablespoons neutral oil (like avocado or canola), or 1/4 cup melted butter
-
3 tablespoons sugar
-
1 large egg (for the dough)
-
1 1/2 teaspoons salt
-
3 to 3 1/2 cups all-purpose flour
For finishing (choose one):
-
1 egg + 1 tablespoon water (for optional egg wash)
-
2 tablespoons melted butter (for brushing after baking)
-
1 tablespoon sesame seeds (optional, if using egg wash)
Instructions
-
Preheat the oven to 425°F. Grease a large baking sheet or line with parchment paper.
-
Activate the yeast:
In a large mixing bowl, stir together the warm water, yeast, oil (or melted butter), and sugar. Let the mixture sit for 5–10 minutes until it becomes foamy.Tip: If the mixture doesn’t foam, your yeast may be inactive. Start fresh for best results.
-
Make the dough:
Whisk in the egg and salt. Gradually stir in 3 cups of flour, adding a bit more as needed until a soft dough forms. The dough should be slightly tacky but easy to handle. -
Knead the dough:
Turn the dough out onto a floured surface. Knead for 5 to 7 minutes, or until the dough is smooth and elastic. -
Shape the buns:
Divide the dough into 8 equal pieces for large buns or 12 for smaller buns. Shape each piece into a ball and gently flatten the tops. -
Let them rise:
Place the buns about 3 inches apart on the prepared baking sheet. Cover loosely with a clean towel and let rise for about 15 minutes, or until nearly doubled in size. -
(Optional) Finish before baking:
For a golden, glossy finish, whisk the extra egg with 1 tablespoon of water and brush it over the tops of the buns. Sprinkle with sesame seeds if desired.
If you plan to brush with butter after baking instead, skip this step. -
Bake:
Bake for 8 to 12 minutes, or until the buns are golden brown. -
Finish and cool:
Remove the buns from the baking sheet and place them on a wire rack. If you didn’t use the egg wash, brush the warm buns with melted butter for a soft, flavorful crust. Let cool before slicing.
- Prep Time: 35 minutes
- Cook Time: 12 minutes


I use this recipe for literally everything. Garlic knots, hamburger buns, fancy cast iron focaccia bread, breadsticks, garlic naan… any meal that I want bread for but I ran out of time and don’t have an hour to let it rise, I use this recipe. Always comes out fluffy and soft.
Delicious! These buns were so easy and tasted great.
I made this recipe this morning and it is FABULOUS!!! The only thing I did different was replace 1 cup flour with 1 cup whole wheat and I did use rapid rise yeast. The next time I AM DOUBLING the recipe.
I’m so happy you like the recipe!
Hi. I just tried this and they cane out perfect! This recipe is a keeper! When I made the dough I thought they were going to turn out like sliders so I divided it into 6 pieces. I left them to rise for half an hour and they turned out quite huge… to the delight of my family! I brushed them with milk and baked them for 8 minutes. They browned quite nicely and were soft and delicious! Thanks so much for sharing!
I’m so happy you (and your family) enjoyed the recipe!
Going to try this recipe.. am I reading this correctly that you only need dough to rise in individual balls, or allow to rise as whole dough then as individual balls?
Thanks!
That’s correct. They only need to rise once, after shaping them into individual balls. (Sorry I didn’t reply sooner! Somehow I missed your comment)
Thank you! Trying this weekend
Thx for this fantastic recipe!
I made these faster than it would have taken me to drive to town to buy them!
Have made them twice and they are great!. Easy recipe to follow
Same with me – it’s faster to make a batch of these than it is to run to the store! I’m glad you liked the recipe!
Very good recipe. Thank you so much for sharing. Everyone loved them and they were super simple to make. I didn’t have any bread or eggs on hand for burgers. So I found this recipe and made a flax egg in place of the egg. It turned out great. So great that I am making more tonight!! Thanks again for the great recipe.
I’m glad you liked the recipe! And it’s good to know that it works well with a flax egg!
These were great but they were very yeasty. I was wondering how they’d turn out when I read 2 whole tbs of yeast. The dough smelled like beer and so do the buns. I can’t really taste it in the buns but the smell does turn me away from making them again. Yes I did use the correct amount of yeast.
I’m sorry the buns didn’t work out for you. Unfortunately, you really can’t reduce the amount of yeast if you want them to rise in the allotted amount of time. I have never had it smell like beer, though. Is it possible you used instant yeast instead of active dry yeast? If using instant or rapid-rise yeast, you do need to reduce the amount of yeast in the recipe.
These are fast and wonderful! I also have made them as smaller dinner rolls with same great texture and softness.