
Easy Homemade Yogurt Recipe (Creamy & Delicious)
Did you know that you can make homemade yogurt without any special equipment, such as an Instant Pot or a yogurt maker? It’s true! With my easy homemade yogurt recipe, I will guide you through the step-by-step process of making your own yogurt. This recipe will help you keep your fridge stocked with a supply of delicious and nutritious homemade yogurt. {If you enjoy this recipe, also check out my recipes for Strawberry Jam and Peach Barbecue Sauce.)
Yogurt is not only great for snacks and smoothies but is versatile for lots of other cooking and baking purposes, too. It can be used to make baked goods a little lighter and also as a lower-fat substitute for mayo and sour cream. And because it’s fermented, yogurt is filled with lots of gut-friendly probiotics.
In reality, though, not all yogurt is created equal. Many store-bought yogurts are filled with unnecessary additives, as well as loads of sugar (resulting not only in a less healthy yogurt but one that is often overly sweet and artificial-tasting). Also, not all yogurts have live, active cultures, which means they lack the health-giving benefits of the probiotics that we tend to expect in our cup of yogurty goodness.
Don’t get me wrong – delicious, healthy, and probiotic-filled yogurts are available to buy at the grocery store. The problem is, they often come at a premium price. It doesn’t seem like a lot of money to pay $2 or more for a 5-ounce cup of yogurt until you consider that I make half a gallon of my homemade yogurt for $3-4 (that’s 64 ounces)! Of course, the cost will vary depending on the type of milk that you use and the price of milk in your area, but if you use yogurt in your kitchen regularly, a batch of DIY yogurt is probably worth the minimal effort that it takes. (And it stores well. A batch of yogurt should last 2-3 weeks in the refrigerator.)
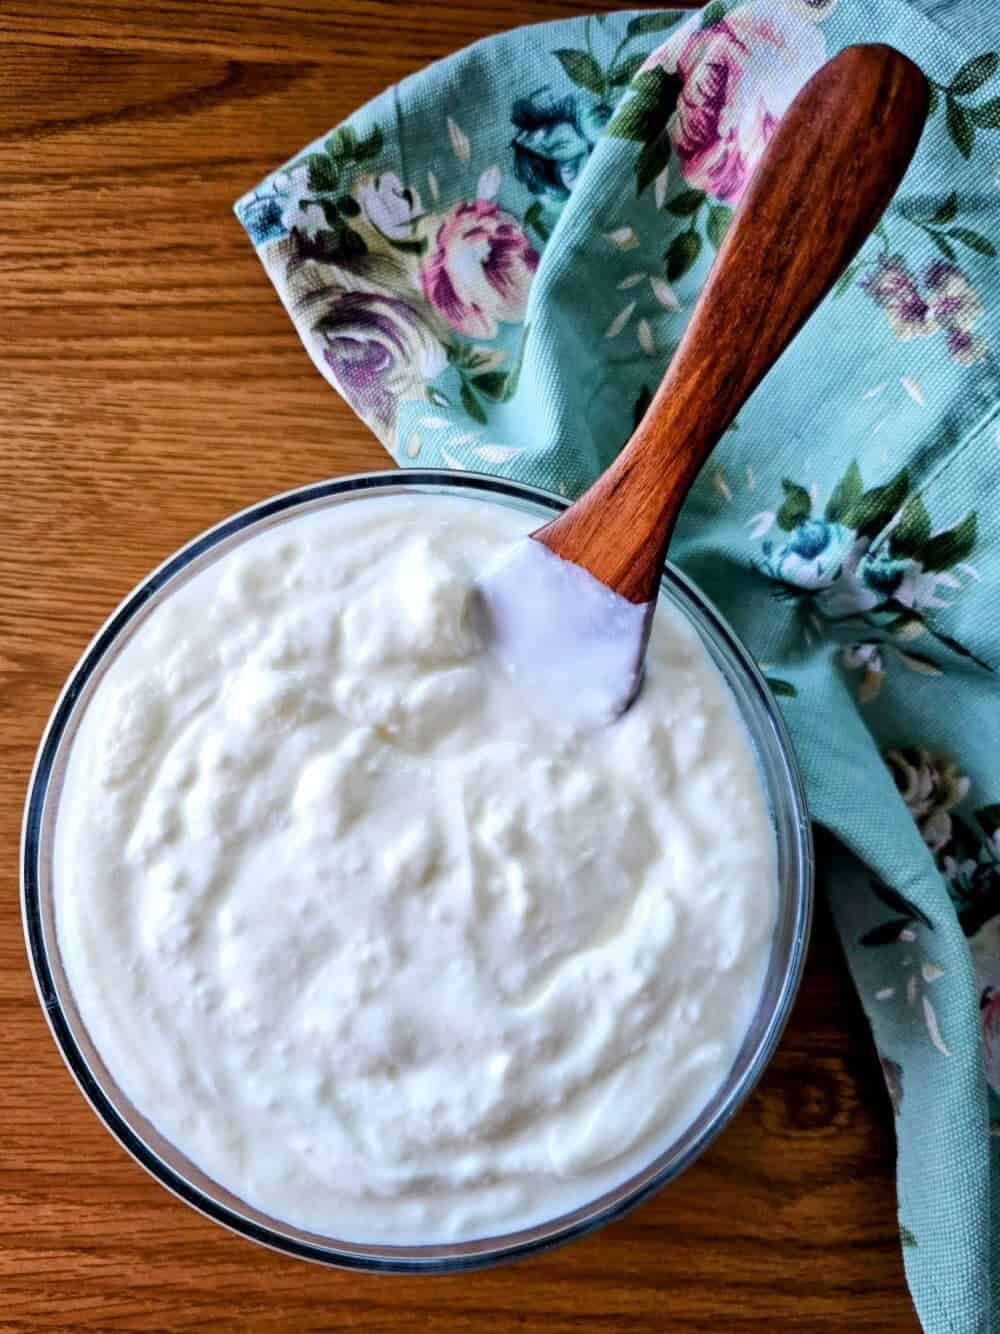
Homemade Greek Yogurt
When making homemade yogurt, there are several important things to keep in mind. One thing is the consistency of the final product. Homemade yogurt can be thinner than store-bought varieties because it lacks the thickeners typically added to commercial products. This is especially true if you use low-fat milk, as lower fat content results in a thinner and less creamy yogurt.
Some recipes address this issue by incorporating ingredients like dry milk powder or plain gelatin to create a thicker texture. However, my recipe is straightforward and requires just two ingredients: milk and a small amount of starter culture. If I want my yogurt to be thicker, I drain off the whey to make it Greek-style using a colander and cheesecloth. This method keeps the process simple, with no need for additional ingredients.
And there is no need to waste the whey. It’s perfect for using in baked goods like pancakes and muffins.

Equipment for Making Homemade Yogurt without a Yogurt Maker or Instant Pot
There is some basic equipment that is helpful to the yogurt-making process. You will need some glass mason jars, a heavy-bottom pot, and a big spoon. A clip-on candy thermometer is helpful, although not totally necessary. If you want to strain your yogurt, you will need some cheesecloth, a large coffee filter, or even a flour sack towel.
How to Incubate Yogurt
You will also need a way to incubate your yogurt at approximately 110 degrees Fahrenheit. The bacteria need warm milk to work. The bacteria that ferment the milk into yogurt prefer a nice, warm temperature of about 110 degrees Fahrenheit. Some people will use their oven with just the oven light on. I’ve also heard of using a heating pad. For many years, my incubator was an old cooler that I packed with jars of very hot water. This method works wonderfully and is probably the best way to incubate yogurt with no special equipment. These days, I use my food dehydrator set at 108 degrees Fahrenheit.
Ingredients for Making Yogurt
There are only two ingredients. First, you will need a half gallon of the milk of your choice. I’ve successfully used everything from skim milk to whole milk (even adding a little half-and-half or heavy cream on occasion). You can use either homogenized or non-homogenized milk, but non-homogenized milk will have a layer of cream that forms on top of the finished yogurt, which is something that I rather like.
The only other ingredient is a yogurt starter. You can purchase a freeze-dried starter culture online like I do, or you can simply use a small amount of store-bought plain yogurt (but be sure it states that it has live, active cultures on the package).
Another option is to use some yogurt from a previous homemade batch, but this may become less effective over subsequent batches. This weakening of the starter with successive batches can be avoided if you use an heirloom-style starter culture. My favorite and the one I use the most is an heirloom Bulgarian yogurt culture. It makes a thick, creamy yogurt with a delicious tangy flavor.
Tips for making easy, Homemade Yogurt:
(The complete recipe and steps are in the recipe card below)
- Before adding the starter culture to the milk, you will need to heat the milk to 180°F. There are a couple of reasons for this. The first reason is to kill off any bacteria in the milk to start the fermentation process with a clean slate. However, the second (often overlooked) reason is texture and consistency. Heating the milk denatures the proteins and helps to make the yogurt thick and creamy. From my own experience, I find I get the best results by heating the milk very slowly over medium-low heat and then cooling it very quickly in an ice water bath. A small slow cooker works great for this.
- I have often read that ultra-high temperature (UHT) milk should not be used for making yogurt because it may not ferment properly. Many store-bought organic milk brands are UHT. However, I have never experienced any issues using UHT milk to make yogurt. That said, I do find that yogurt made with ultra-pasteurized milk has a slightly “cooked” flavor that I don’t enjoy, so I choose not to use it. Instead, I prefer low-temperature vat-pasteurized milk or regular pasteurized milk. Ultimately, it’s best to use whatever type of milk you enjoy most.
- This recipe makes half a gallon of yogurt. If this is too much for you, simply cut the recipe in half or even a quarter.
- Keep in mind that the incubation period can vary from a few hours to around 10 hours, depending on how firm and tangy you like your yogurt.
- Homemade yogurt will store well in the refrigerator for several weeks. If it starts to look bad or smell funny at any point, discard it and make a new batch.
- And remember, if you want to keep your yogurt going from batch to batch, set aside 1/4 to 1/2 a cup from each fresh batch to use as your starter for the next batch. You can freeze the starter yogurt to keep it extra fresh.
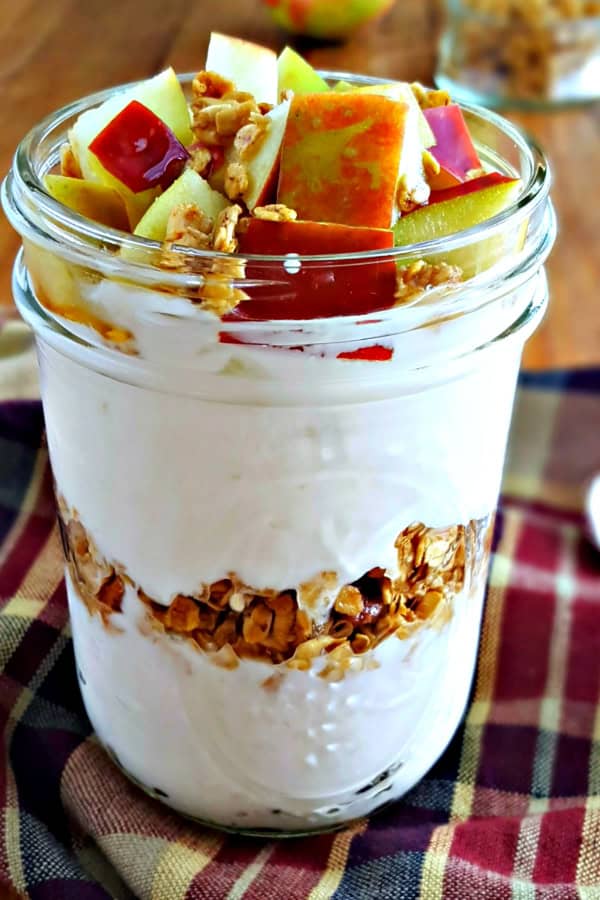
- For sweet yogurt, stir in your choice of sweetener or add it as a topping. I like a drizzle of honey or maple syrup over my bowl. You can also stir in fresh fruit, nuts, shredded coconut, or whatever you like.
- And if you’re looking for a way to use your homemade yogurt, try my recipe for Creamy Maple Apple Cider Vinaigrette.
And that’s all there is to making your own yogurt. Even if it seems a little complicated at first glance, it is very easy once you make it. You’ll refine your process, and it will become easier and easier.
If you try this recipe for Easy Homemade Yogurt, I’d love to hear how it turned out for you! Share your thoughts in the comments below, and don’t forget to rate the recipe—it helps others discover it too!
Be sure to follow me on Facebook, Pinterest, and Instagram for more homemade recipes
*As an Amazon Associate I earn from qualifying purchases. This post may contain Amazon or other affiliate links, which means I will earn a commission at no additional cost to you if you click through and make a purchase.*
Print
How to Make Easy Homemade Yogurt
- Total Time: 9-11 hours
Description
It’s easy and frugal to make a delicious batch of homemade yogurt. This recipe gives simple instructions for making 1/2 gallon of homemade yogurt (without a yogurt maker or Instant Pot).
Ingredients
- 1/2 gallon (2 quarts) milk
- 6 tablespoons plain yogurt with live cultures or a premade yogurt starter *see notes below
Instructions
- Pour milk into a heavy-bottomed saucepan or Dutch oven, and slowly bring the temperature to 180 degrees Fahrenheit, stirring constantly to prevent the milk from scorching and sticking to the bottom of the pan. Note: It’s best to use a candy or instant-read thermometer to measure the temperature accurately. If you don’t have a candy thermometer, however, you can simply heat the milk to just below the boiling point when tiny bubbles start to form around the edge of the pot. You can also use a slow cooker to bring the yogurt up to temperature, stirring occasionally.
- When the temperature reaches 180 degrees Fahrenheit, remove the pot from heat. Quickly cool the milk to 110 degrees Fahrenheit. Note: An easy way to do this is to (carefully) pour the hot milk into a metal mixing bowl that is nestled into a sink or large bowl full of ice. If you are not using a thermometer, cool the milk so that a drop placed on the wrist will be slightly uncomfortably warm to the touch (but be very careful not to burn yourself!)
- When the milk cools to 110 degrees Fahrenheit, whisk in the starter yogurt or starter culture. Be sure that the yogurt is completely blended into the milk. Do this quickly without allowing the milk to cool. Divide milk evenly between 2 quart or 4 pint-size canning jars. Wipe the rim, and apply the lid and ring loosely to the jar.
- Place the jars in a warm spot (approximately 110 degrees Fahrenheit) to incubate for 8-10 hours. * See notes below And remember, the longer the yogurt ferments, the tangier and more firmly set it will become. So use your own judgment as to when it is done, based on the taste and the set of the yogurt.
- If you prefer a thicker, Greek-style yogurt, strain the finished yogurt in a sieve lined with cheesecloth, or flour sack towel. Allow it to strain for several hours until most of the whey has strained off. The whey can be saved to add extra nutrition to smoothies, soups, and baked goods.
Notes
For a yogurt starter, you can use plain store-bought yogurt that contains live, active cultures. You can also use a store-bought starter. I like this Bulgarian culture, or you can find a variety of yogurt cultures on Amazon or at Cultures for Health. I recommend purchasing an heirloom starter so that you can keep it going from batch to batch.
When it comes to incubating the yogurt, one low-tech way to do this is to place the jars in a cooler, surrounded by canning jars of very hot water. Then close the lid and I don’t start checking the the set of the yogurt for at least 8 hours. If the yogurt is not set at this time, refill the jars with hot water, if necessary, and allow to incubate for a few more hours.
Another way to incubate yogurt is to use a food dehydrator that has a precise temperature setting, like this one by Cosori.
- Prep Time: 1 hour
- Inactive Time: 8-10
- Cook Time: 0 hours


Super easy, worked well. So glad I didn’t have to invest in new equipment just to make yogurt.
I’m happy to hear it was a success!