
How to Start a Victory Garden
The original Victory Gardens began in World War I and became even more popular again during World War II. During these times, American, Canadian, British, and Australian governments encouraged their citizens to grow food in any available space to supplement their rations and ease the burden on the food supply system. The results were spectacular. Suburbanites, urbanites, and rural communities collectively grew millions of tons of vegetables during this period. And if you’re interested in this idea, you may be wondering exactly how to start a victory garden in this modern day. If so, stay tuned, and I’ll give you some of my tips for getting started. (And for even more garden tips, check out my Old-Fashioned Gardening Tips from our Grandparents!)
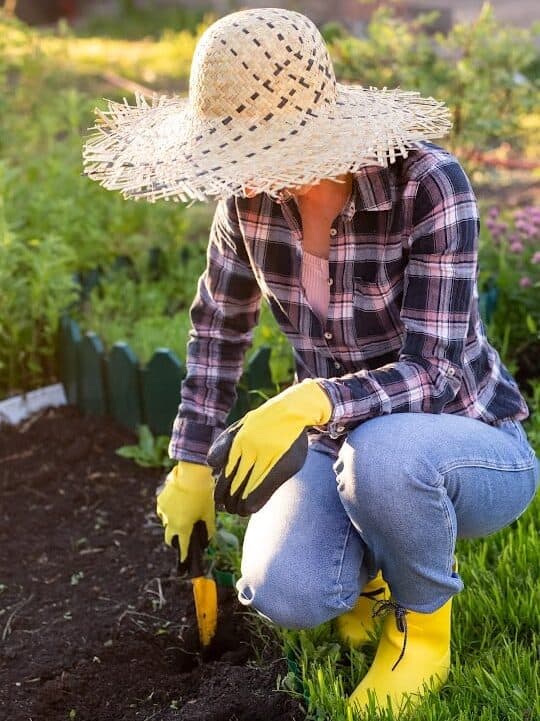
Although we aren’t amid WWI or WWII, we do find ourselves in a strange and anxiety-provoking time, complete with its own unique set of struggles. Rising grocery prices, supply chain problems, and food shortages are becoming all too common. I find myself struggling with growing anxiety over all of it. But in all of this turmoil and uncertainty, I’m grateful to have a garden that serves as a source of comfort. I find that getting my hands in the soil is grounding, and growing some food for my family and being more self-reliant gives me some peace of mind.
And so I believe that a modern-day victory garden may help to ease the struggle for many of us. Whether it is just a pot of lettuce on the patio or some herbs on a windowsill, every little bit counts. Growing some of our own food allows us to be a bit more independent and secure during these stressful times. There is a real sense of purpose and satisfaction that comes with growing our own nutritious food. And if you are able to get outdoors for some gardening, you may find that just the fresh air and exercise help to boost your morale.
So for anyone who is interested in how to start a Victory Garden, I’m outlining some simple, straightforward tips to guide you in getting started quickly.
These tips are mainly focused on containers, raised beds, and/or a basic in-ground vegetable patch. There are, however, many other methods of gardening out there, including various no-till methods like Back to Eden gardening. I’m not covering those methods here, because I want to help you get your garden growing as quickly, easily, and stress-free as possible. But if you’re interested in getting started with a no-till garden right away, there are many how-to articles on the internet, like this one by Grow Veg.
Author’s Note: I originally wrote this post in the spring of 2020 when there were shortages of gardening supplies and supply chain interruptions. Now in the spring of 2022, it seems we’re having more of the same. And while gardening supplies don’t seem to be in short supply the way they were in 2020, there may still be some difficulty in sourcing both seeds and transplants right now. With the huge surge in demand, there may be items like seeds, soil, gardening tools, and amendments that are occasionally out of stock or back-ordered. But take heart and don’t give up. I’m often able to track down the gardening items I’m looking for at my local shops, or online, if necessary. If I can’t find what I need, I can always find a workaround. Necessity truly is the mother of invention.
Now onto the tips for how to start a victory garden of your own.
Location
The first thing to do in planning your new garden is to decide the location. Most vegetable plants require a minimum of six hours of full sunlight a day (and more is better.) Also decide if you will be planting directly in the ground, in containers, or in raised beds. Each method has its pros and cons:
Container Garden
If you only have a patio or a porch or other small space, containers and elevated planters are a good choice. You can arrange your containers to fit your available space, and they can be moved around as needed. A container garden is convenient, and, being easily accessible, you can just run out to your patio to harvest whatever you need for dinner. They’re also great for anyone with mobility issues.
Use containers that have drainage holes (or drill drainage holes if you are using something like a bucket). Be sure to choose containers that are large enough because the plant roots need lots of room. For large plants like tomatoes, I find a 5-gallon bucket is about the ideal size for a single plant. If you have space, elevated wood planters are ideal for growing leafy greens and herbs. Some of the deeper elevated planters are also good for vegetables with deep roots, like carrots or beets. You can buy a ready-made wood planter or DIY a wood planter (I like these plans for a $20 planter by Ana White.) There are also specialty grow bags made that come in a range of sizes that you can grow virtually anything in (I especially like the bags for growing potatoes.)
For maximum success in your container garden, use a good quality potting mix (not a bag labeled as garden soil), and plant varieties that are compact and suited for containers. Keep your containers well-watered, but not over-watered. Give them good ventilation, six-eight hours of sunlight, and use a good-quality organic fertilizer once or twice a month.
Raised Bed Garden
If you have space in your yard, raised bed gardens are ideal to get up and running with a garden quickly. Raised beds tend to be easier to maintain than an in-ground garden, with less weeding and watering required. And like container gardens, they can work well for those with back pain or mobility issues. Also, you can start your beds with a pre-made soil mix that has added nutrients, so soil testing and amendments aren’t necessary as they are with an in-ground garden.
There are a few downsides to raised bed gardens, too. Of course, the startup cost is a consideration and a potential downside (there are, however, many plans out there for inexpensive DIY raised garden beds, like this plan from A Modern Homestead). Also, depending on the size of your raised beds, it may be impractical to grow large vegetables like pumpkins and watermelons. The bottom line is if you have some yard space, but poor soil, or if you just want a garden that is lower maintenance, raised beds are a good choice.
In-Ground Garden
For a garden with fewer start-up costs, and room to grow large vegetables, then you might want to plant an in-ground garden. It takes a bit of physical labor, but if you have the available space, you create a new garden plot quickly by planting it right in a patch of your yard.
Look for a sunny spot with at least six hours of full sun daily. And think about a water source, too. How will you get your water to your garden? Are you near a water supply or will you have to fill a watering can at the kitchen sink and cart it out to the garden? You’ll need to place your garden in a location where you can get water to it regularly.
Once you find the perfect spot, the next step is to mark out the boundaries (I like to do this with stakes), and then use a spade to remove any existing sod. At this point, you may need to use a tiller to break up the soil. Don’t til the soil more than 12 inches deep, or you risk damaging your soil structure. Depending on the type of soil you have, you may find that a garden fork is all you need to loosen the soil for planting.
Next, test the soil. Testing your soil is the best way to ensure that your garden will actually grow and produce abundantly. There are inexpensive kits you can buy at any hardware store or online. Your test results will determine any amendments you might need, such as aged manure to add nitrogen, bonemeal for phosphorus, or kelp for potassium. This article by The Old Farmer’s Almanac can help guide you in preparing your soil. Again, use your tiller or garden fork to work in any needed amendments.
Pay attention to the structure of your soil, too. If you have heavy clay soil with poor drainage, you’ll want to fix this before putting in the garden. One way to do this is to add organic matter to the soil in the form of compost (added bonus – compost will add nutrients, too). Sand and perlite can also help to improve soil drainage. Check out this guide from The University of Maryland Extension on how to improve soil drainage.
One more consideration for your in-ground garden is any local ordinance or HOA rules that may apply. Depending on where you live, there may be some type of regulation about where on your property you can plant a garden. Make sure you know about these up-front because it would be a terrible waste to install your garden only to have to tear it out again for violating local regulations.
Planning Your Garden
What to Grow
What do you want to grow in your new garden? Ripe, juicy heirloom tomatoes? Rows of bright, green kale? Crunchy cucumbers? All fine choices.
When planning your garden, it’s important to think about the purpose of your garden. Do you want to supplement a small amount of your diet with some garden-fresh vegetables? If so, be sure that the vegetables you plant are the ones your family likes and will actually eat. It’s tempting to go crazy experimenting with new vegetables, but that is likely to end up in a lot of waste. Stick mainly to what you know your family enjoys.
Or maybe are you looking to grow enough to can and preserve. If your goal is to put up thirty jars of tomatoes, choose determinate varieties like Roma and other paste tomatoes that produce a lot of tomatoes all at once and are ideal for canning. If you like pickles, seed out varieties of pickling cucumbers that are suitable for your climate. Research the varieties that will best suit your preserving needs.
And what if your goal is to go all out and grow a large portion of your food? If this is your goal (and it’s a lofty one), look to calorie-dense and starchy vegetables like potatoes, sweet potatoes, winter squash, beets, carrots, turnips, beans, and corn. Of course, also include other nutrient-dense vegetables like leafy greens in your plan, but your family can’t live on kale alone. If you want to survive off of what you produce from your own garden, calories matter.
When to Plant
The first thing to know is that not everything will grow at the same time. Many leafy greens and root vegetables tend to be cool weather crops, meaning fall and spring (this doesn’t apply to sweet potatoes which is a tropical plant that loves the heat). Plant tomatoes, peppers, and zucchini in the late spring and harvest throughout the summer.
It’s also important to know the average first day of frost in the fall and the average last day of frost in the spring for your local area. Knowing this will help you determine when to start seeds indoors, directly sow seeds outside, or plant seedlings. You can determine your average frost dates here.
Timing is everything when it comes to gardening. I find it helpful to use a simple sliding plant chart [affiliate link] to determine when to plant my crops. Your local state or county extension office will usually also have an online chart of planting dates for your area.
Layout
Decide on the layout of your garden. Plants need to be spaced adequately in order to be healthy and give you maximum yields. If you’re starting with seeds, most seed packets will give you information about spacing. If you’re buying seedlings, they will also sometimes come with information about spacing your plants. It’s also easy to do an online search to find this information. I find the best way to plan the layout of your garden efficiently is to use graph paper to draw a layout.
I also find it helpful to use a garden planner like this one by Melissa K. Norris [affiliate link]. A planner like this will help you decide what to grow, how much to grow, plus when to plant and harvest.
Caring for the Garden
Weeds and Pests
When it comes to managing pests and weeds, I like to do it as organically as possible. It’s better for you and better for the planet to avoid toxic chemicals as much as possible.
For weeds, simply weeding your garden regularly will do the trick. Using a small hoe can be useful in this task (just be careful not to damage your vegetable plants). A layer of mulch, like straw, salt hay, or even plain compost spread over the garden will help to keep the weeds down.
As for pests, there are whole books out there devoted to this topic, so I’ll just keep it simple:
- Mechanical Pest Control – I prefer to look at mechanical means of pest control first. For instance, floating row covers for leafy greens and small seedlings can be very effective in protecting your plants from pests. For pests like tomato hornworms, simply plucking them off the plants is the best method I’ve found. There are sticky traps you can buy that can help to control cucumber beetles and aphids. If you have large pests like deer and other critters, a fence may be a good investment.
- Biological Pest Control – And attracting beneficial insects to the garden is a good strategy for controlling destructive pests. As an example, growing flowers like marigolds and calendula will help to attract beneficial ladybugs to your garden. See this article from Fine Gardening for more information about beneficial insects.
- Chemical Pest Control – As I mentioned earlier, I am not a fan of dousing my plants in toxic chemicals. There are, however, safer organic chemical forms of pest control available. But I don’t use any chemicals, organic or not, indiscriminately in my garden. Typically I use chemical pest control as either a last resort or as a preventative early in the season.
Organic pesticide sprays, horticultural oil sprays, and insecticidal soaps are examples of organic chemical pest control. A bacteria called Bacillus thuringiensis is a type of biological pest control. If you are having a problem with pests in the garden, and you feel like you need to use chemical or biological means, I recommend contacting your local county extension office. There are also many gardening reference books that cover the subject of pest control in greater detail.
Fertilizing
If your soil is nutrient-rich and you’ve added compost and other amendments to your soil, you may not need to add additional fertilizer. Most summer vegetables, like corn and tomatoes, are heavy feeders, however, and may require some extra fertilizing. But don’t go overboard with fertilizing – too much nitrogen in the soil may result in large, healthy plants that bear little to no fruit.
For the homemade options, compost tea and grass clippings are homemade fertilizers that will provide a slow boost of nitrogen (and in the case of compost tea, beneficial organisms, too). If you are a DIY-type gardener, you can certainly give these a try. But to ensure success, I also like to keep a store-bought organic, liquid fertilizer on-hand to use every 3-4 weeks during the summer. You can also use dry granular fertilizer. Granular fertilizers release more slowly than liquid and will take a bit longer to work their way into the soil. I find that dry, granular fertilizers work best when worked into the soil early in the season, while liquid fertilizer provides a quick nutrient boost (if needed) during the growing season.

Harvest Time
When it comes to learning how to start a victory garden, one of the most important things you’ll need to learn is when to harvest. Bigger is not always better. Many vegetables become tough and fibrous if left on the vine for too long. (If you’ve ever tried to eat an overgrown zucchini, you know I speak the truth). It’s best to pick vegetables at the height of their maturity, and not let them go beyond that. The best practice is to bring a basket out to your garden daily to pick whatever is ripe and ready to go.
Certain vegetables, like tomatoes and peppers, can be picked when they are partially ripened and then allowed to ripen on the counter or windowsill. Winter squash and melons should be picked when they are fully mature because they will not continue to ripen once they have been picked.
There is a bit of an art and some practice that goes into figuring out when it is time to harvest, but knowing the particular variety of your garden plants can help guide you in this. Familiarize yourself with the cultivar of your vegetables in your garden and do some research to find out its approximate size and characteristics at maturity (you can often find this information on the original seed packet).
Own a Good Reference Book
I find it essential to have a good reference book (or two) from a trusted and reliable source on hand. It’s handy to have a book that can tell you about growing specific vegetables, that can help you out with plant diseases and pests, and that can just generally help you along your gardening journey. The internet is an invaluable source of information, but don’t overlook the value of a good book. I like to keep hard copies of all of my favorite reference books because it gives me peace of mind that I will have access to the information in any situation. One of my favorites is the one by The Old Farmer’s Almanac.
So that’s it. I hope my tips for getting started with a Victory Garden are helpful to you. Please let me know in the comments below. Also, please comment with any questions you have or any tips you would like to offer fellow gardeners.
If you’re interested in learning about how to start a victory garden, I hope my tips are helpful to you. Follow me on Facebook, Pinterest, and Instagram so you don’t miss a post.
*As an Amazon Associate I earn from qualifying purchases. This post may contain Amazon or other affiliate links, which means I will earn a commission at no additional cost to you if you click through and make a purchase.*


These are great tips. I am reconsidering my decision not to try to revive my container garden this year!
I’m glad you were inspired by the tips – you can’t go wrong with a few containers of veggies or herbs!
Congrats on being featured today!
I’m gonna link your post to one I had almost finished on the same topic! Great minds!
Great post, and I’m glad that others are seeing the need for growing our food!
Blessings,
Laurie
Ridge Haven Homestead
Thank you for the feature, Laurie! It’s always amazing to connect with other like-minded people!